Featured Post

It's So Hard to Say Goodbye...And Hello Again!

After more than a year of using my website's native blog feature, I regret that it just doesn't work for me.  :-(  There are many ...

October 29, 2009

Sculpture - BRONZE!

ITS A BABY BRONZE GIRL!


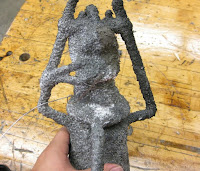
Today was really fun, we poured molten bronze into our ceramic shells, I got to pour mine and a few others, it was REALLY HOT! I was covered from head to toe in leather protective gear! Another classmate took pictures of all that process, so I'll have those up later. The molten bronze was really beautiful to see, glowing and swirling with metallic colors. After they cooled we broke the ceramic shells to reveal the bronze inside! It was like Christmas. lol. After that I sand-blasted the piece to get the ceramic left in the crevices, which also gave her a greyish gold color, then I chopped off the sprews. Next week we we'll grind the nubs off, and the excess pieces. Then the week after that will be polishing and finishing! I've seen some of the other classes' works that are ahead of us, they look really nice! Until then she's just leaning like a cholo! :D


October 24, 2009

3D Watercolor - Installation


For my installation work I made a cocoon. I was told it came out looking more like a piƱata but I suppose its because of the colors and layers, oh well I think it looks cool. I had the most trouble with the corn husks, painted and not. Absolutely nothing I had would make them stick to anything. Not Elmer's glue, not wood glue, not even super glue. So I had to go old school and break out the glue gun, which worked like a charm! Crazy!

October 21, 2009

Sculpture - Sprewing


So the next step in the bronzing process is to "sprew" the wax figure, create valves and vents for the bronze to flow through and fill the cast created by the wax figure, once its been melted out. There is a definite sense of loss during this project, its hard to imagine as hard as I've worked on this little wax figure, its eventually going to be destroyed to create a hopefully equally as beautiful bronze figure in its place.

Looking at the figure, all vented up and prepped for casting, was unsettling. The figure was barely balanced on top of a stick of wax and then straws and small strands of wax connecting various parts to the base. It had become an aberration! And I got scared of it falling apart. Its such a lengthy process! Next is coating it in silicone and sand!


Watercolor Studio-Further Detailing


I bought some fine graphite lubricant thats usually used to lubricate locks and things, to fill in the form of the body, it turned out to not be so difficult to use even though getting it out of the tube was a little difficult at times. The final phase is to fill in the tentacles, what will I do?!

October 15, 2009

Sculpture - Wax Figure


Here are some photos of my progress on my wax figure. Bronze casting in a couple of weeks!

Watercolor Studio - Detailing


In studio today I mostly worked on the graphite areas of the piece. I was actually happy thinking that it turned out better because of the practice I'd had over the summer doing the commissions for my co-worker. I got back in touch with my drawing skills, which hadn't been stretched since Drawing II, quite a few summers ago, heh.

I can't wait to resolve this piece, and see what develops after it!

October 9, 2009

Photoshop!


So I played around with my photos in Photoshop, I kinda liked the results and thought I'd share. This is the same pencil and watercolor, with just a few Photoshop tweaks.

Watercolor Studio - Progress


I was happy to get into the studio today to work on the new painting for a couple of hours.

October 6, 2009

Watercolor Studio

I had a photo shoot with my friend Domonique and got a lot of good pictures. During studio I flipped through them looking for something along the lines of the intense emotional work I had done last semester. I joked to my friend Effie that I missed the drama.
So I decided to paint one in which I used my sculpture I made recently and had her pretend as if he were attacking her. As I sketched out this photo and laid in the colors for the background, my professor walked by and said she thought it could be a finished work and to do a few more sketches like it, to be sure. So I did, and it was pretty fun, although I'm still not sure which one to actually use for a finished work, I like the first two. So I think I will do both of them, one as a big piece, and the other as small work.


October 1, 2009

3D Watercolor- Project 3

-Shadows, Reflected Color, and Construction-

In this project, shadows and reflected color had to be half of our overall composition, we could not use traditional painting surface (watercolor paper), and we had to represent something unseen.

I chose to depict the human aura. My original plan was to create a moving ball of transparent material and paint, and have it shine on a person, casting a shadow surrounded by color and movement. As we only had a week for this project, constructing such a machine was going to take longer than I had, so I came up with a simple solution that would convey my idea. It was more of a concept, and came out looking like a pinwheel toy which was kind of fun.

I painted on unused cd protectors, clipped them to a wooden disc, which I attached to a dowel rod, to make it spin. Below are the pictures of the protectors. I really like how they came out, but they were very fragile pieces of thin plastic and some tore during assembly. :(